
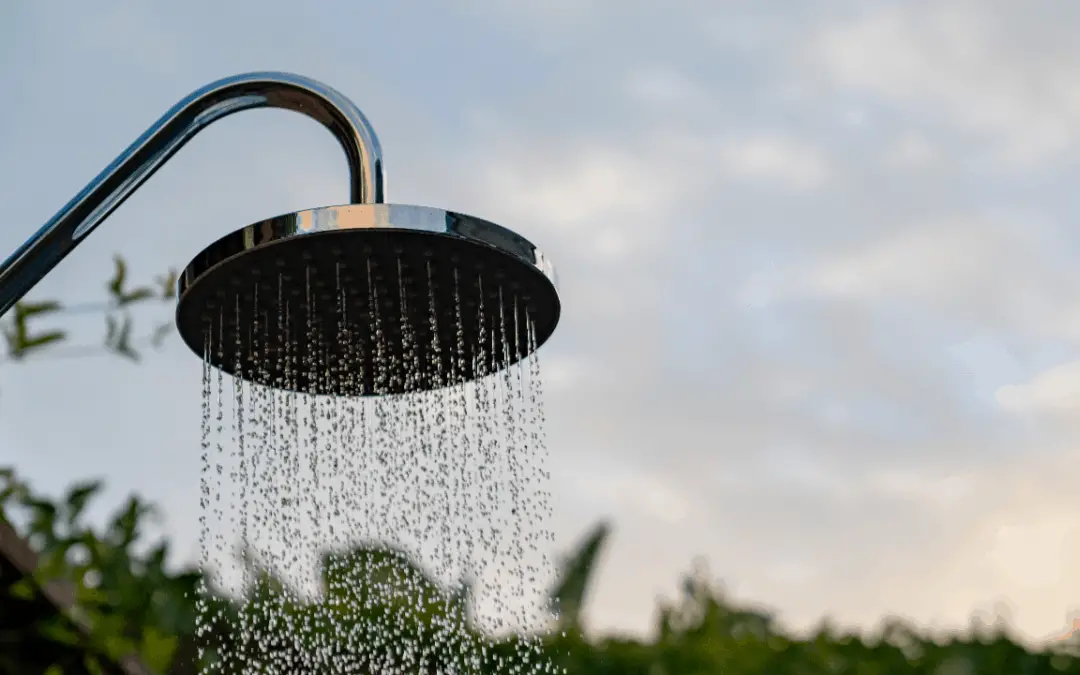
We all know what rain is, but how many of us have actually considered harvesting it to use at home? You may feel comfortable using it for common household uses such as running a load of laundry or flushing a toilet, but did you know it can be used to shower in as well?
According to the CDC, you do not need to treat harvested rainwater in order to use it for showering as long as you practice safe, clean water harvesting techniques. Rainwater is not only safe to use in the shower, but can be beneficial for your hair and skin as well.
So how do you set up a system that can harvest clean rainwater suitable to use in the shower or even to do dishes? Read on to learn how to do it for yourself. It really isn’t that hard.
Related: While it can’t filter your shower water, it can turn rainwater into drinking water for everyone in the house. These filters have a long standing reputation for being one of the best in the biz. Who else you going to trust your drinking water with?
ROYAL BERKEY GRAVITY FED WATER FILTER
How to Harvest Rainwater for Showers?
In order to harvest rainwater and keep it as clean as you possibly can, you must follow a few simple guidelines to ensure its quality.
SIZING YOUR SYSTEM
Before you install your water catchment system, it’s important to know what size tank you are going to need. If you live in the desert and only get an inch or two of rain a year and your roof area is only 400 sq ft, having a 10k gallon tank will do you little good, you’ll never fill it up.
In order to figure out how much you can catch in your given climate, you can use a simple equation:
Roof Area (ft2) X Precipitation Amount (in) X 0.623 = Amount Collected (gallons)
An easier way to remember this is:
1” of Rain on a 1000 sq ft roof = 623 Gallons
In a place like CA, where the rain falls for only a couple months and then it is dry the rest of the year, you will probably want as large of a catchment as you can afford.
Most people do not have the problem of too much rain, but if you live where I do, where we get over 120” a year, we have a different issue to consider.
With all of my roof catchment combined with annual rainfall in East Hawai’i, I can collect over 75k gallons of rainwater per year. It rains regularly here, with 2 months being an extreme drought. Add to that my water usage averages 1500 gallons per month.
There is no need for me to install a 75k gallon water tank, all I need is enough catchment to last me through the dry times, which is a 3000 gallon tank.
To help you calculate the total rainfall that you can collect per year, you can use this handy online calculator that will do all the math for you.
TYPE OF ROOF
Next thing that you will have to consider is the type of roof you will be catching rainfall off of. Asphalt roofs are dirty and leach harmful chemicals. Tile roof is possible, as long as you can manage the debris. The best roof surface to catch rainwater on is from a steel galvanized roof.
Galvanized roofing material is the cleanest roof surface to harvest rainwater off of. It is easy to install, relatively low cost and can last a very long time. Galvanized roofing is also very easy to clean with the use of a pressure washer every year or so.
This type of roofing is recommended for all water harvesting activities and is required when using that harvested water inside of the home.
Therefore, if you do not already have metal roofing as the roofing to your home, it is not recommended to use rainwater inside your home. It can still be used for outdoor use, but would be too dirty if used for showering.
GUTTERS AND DOWNSPOUTS
My favorite gutter system is the seemless gutters made from galvanized metal. These gutters are not only utilizing galvanized metal, but are also really easy to keep clean. They do not collect and pool water like other gutter systems, giving you cleaner water overall.
You can still use other gutter systems, but regular cleaning and maintenance is advised to ensure quality of the harvested water.
Once we drop down from the gutter, I like to make a transition from the typical gutter downspout to a 2” pvc pipe that brings the rainwater to the water tank. Where the pvc pipe meets the metal gutter, I use a 3”-2” rubber reducer coupling to make that transition. Using PVC pipe allows you to tie in multiple downspouts into a main pipe going into the water tank.
Somewhere along the way down from gutter towards ground, it is good practice to install a debris excluder that can help eliminate any unwanted debris in the system. Also, make sure the inlet to the water tank is lower than the gutters to your house and you will be doing OK.
Where the water enters the tank, I like to install another filter onto the inlet pipe to ensure I am doing all that I can to keep the water clean. The filter is symple, all it is is a panty hose tied over the outflow of the pipe that is inside the water tank.
*First Flush Diverter Disclaimer*
You may have heard of a first flush diverter and wondered why I did not include it. If you don’t know what a first flush diverter is, essentially it flushes the first rainfall before going into the tank, theoretically disposing of unwanted debris from a season of build up.
The thing is, the really aren’t all that necessary. In fact, all 5 panelists at American Rainwater Catchment Systems Association conference in 2013 agreed that they do not use first flush diverters, stating that they’ve been hired to take more of them out rather than install.
They are an unneeded costly expense and that is why I do not recommend them.
WATER TANK
Hopefully you’ve sized your tank, now you have to choose a style. There are many styles to choose from. There are plastic tanks, tanks from galvanized metal with a liner, concrete tanks, bluebarrel tanks. For me, it comes down to cost, with galvanised metal tanks with a rubber liner being the best bang for the buck.
Whatever kind of tank you do get, make sure it is covered from direct sunlight and that it sits on a level pad made of concrete or gravel. Install your inlet pipe to the tank and be sure to also include an overflow pipe for the times when your tank is at peak capacity.
PLUMBING IT ALL TO THE SHOWER
Now we have a tank full of water, but how do we get it from the tank to our shower? If you have gravity on your side, then by all means use it. If you are like the rest of us, you will probably need to set up a pump system.
Using 1” PVC, run an outlet line from the bottom of your tank, or if you are using a galvanized tank with liner, start with a foot valve and run that pipe to a pump. Since I am off grid, I use a small flowjet pump for all of my household water. That pump is hooked up to a pressure tank with pressure regulator.
The pump runs until it pressurizes the pressure tank. Once there you use the pressure coming from the pressure tank until you hit your minimum PSI which in turn kicks the pump on again.
From the pressure tank, you can install some filters. I use a 30 micron filter and 15 micron filter. At this point you can also install more advanced filters that could filter the water down to a point to make the water drinkable.
Once past the filter, plumb the water to your hot water heater, whether it be a conventional water heater, a compact, efficient hot water on demand system or solar hot water panels. From there, run both hot and cold water lines to your shower and you are all set. Free water clean enough to shower in.
Related: Off Grid Water Harvesting: How To Install a Rainwater Catchment System
How to Treat Rainwater for a Shower?
Once in a while, your harvested rainwater will need additional treatment to keep it in good condition. Most people add a cupful of bleach directly into the water tank per 5k gallons every month or so to shock the water, killing any algae growth and potential parasites.
I have heard of a more natural solution in the form of beneficial microorganisms. The process is the same as for bleach and the idea is the microorganisms perform the same job as bleach, only naturally.
Benefits of Showering with Rainwater
Not only are you utilizing a free resource that falls from the sky, you are also using water that is better for your hair and skin.
Rainwater is considered “soft” water, meaning it has less minerals than other water sources such as river or groundwater that has picked up minerals from rock that it comes in contact with. Your hair loves soft water!
Rainwater is also free from heavy metals and is Ph neutral. If your skin is sensitive to hard water, then it’s going to love showering with rainwater.
Shampoos and soaps also work better in soft water, allowing you to use less of it while at the same time doing a better job.
If that wasn’t enough, using rainwater that you harvested yourself to take showers minimizes your carbon footprint. You no longer have to rely on water that is sometimes pumped from hundreds of miles away to get to your tap. You have a source of water that you control and that is what going off grid is all about.
You Can Use Rainwater For More Than Showering
I hope you’re excited to start harvesting your own rainwater for showering. But don’t stop there. Rainwater is great for the garden, washing dishes, flushing toilets, doing laundry or if you filter it properly, drinking.
You can replace your reliance on the government providing you water and take back that responsibility for yourself.
Where I live in East Hawaii, everyone is on water catchment and we use that water for everything. We think it’s normal. There is no reason why it shouldn’t be normal where you live too.
So what are you waiting for? Get a water tank and begin harvesting that rainwater. Aloha!!
Homesteadinhawaii.com is a participant in the Amazon Services LLC Associates Program, an affiliate advertising program designed to provide a means for sites to earn advertising fees by advertising and linking to Amazon.com. This site also participates in other affiliate programs and is compensated for referring traffic and business to these companies.