
One of the few places in the United States where you can grow vanilla is right here in Hawai’i. It’s a pretty new crop to the islands, only having been cultivated for just over 20 years.
Because it likes to climb, vanilla grows best alongside trees or up columns that have plenty of shade. It does best in rich, porous soil high in Potassium. It grows well below 1000ʻ in Hawaii in areas of modest rainfall.
I just started growing vanilla myself. I wedged a cutting between some rocks under an avocado tree, threw some compost over it, trained it up the tree and 4 months later, itʻs starting to take off. I donʻt know about you. but I love the fact that I can grow my own.
If you want to try growing vanilla, here’s some information I’ve rounded up from other local growers here in East Hawaii.
Vanilla is part of the orchid family, making it a flowering vine that has two types of roots – roots that go into the ground and anchor it (terrestrial) and roots that help it climb, by attaching to walls or tree trunks. These are known as ‘air roots’.
Related: I love growing vanilla vines. Especially healthy ones. Every 6 months or so I add a good fertilizer to ensure my vanilla orchids stay healthy. One of the best fertilizers I have found for this task is Jackʻs Classic 30-10-10 Orchid Fertlizer. The difference shows.
Jackʻs Classic 30-10-10 Orchid Fertilizer
How to Propagate Vanilla
The best way to propagate vanilla is by cuttings. Aim for six or more leaves on each cutting. I was told to take off 2 bottom leaves from the vine and stick it in the soil up to the first remaining leaf.
Plant your vanilla either beside a sturdy tree, columns, or trellis so that it can climb. Tie the plant to a stake (my friend recommended a kitchen twist-tie). You don’t want to strangle the thing, just provide the plant with support.
Keep an eye on your newly-planted vanilla cutting for the first month or two. You’re looking to see that the soil around it is damp, but not soggy and that it has enough support until it anchors itself to the trellis or tree.
Once it has fastened its air roots to a tree base or started climbing the trellis, then you’ve succeeded.
What Type Of Soil Does Vanilla Grow Best In

Vanilla grows well in healthy soil that has high porosity and lots of potassium.
Plant your cuttings in soil that is a mixture of compost, crushed cinder soil and, if you can get some, crushed macadamia shells.
A little tip: seaweed, banana peels, as well as wood ash can increase soil’s potassium levels, so mix some up with your compost (or feed a little to your worm farm).
How To Fertilize Vanilla
Because vanilla is technically an orchid flower, you can treat it as such and give it orchid fertilizer every couple of weeks. When it is in active growth, a high nitrogen 30-10-10 fertilizer is best, at other times you can use a 20-20-20 fertilizer.
Do not add fertilizer to dry soil, it can lead to severe root damage and leaf drop off.
Don’t assume that just because vanilla is an orchid it wants to grow near its cousins. Actually, the opposite is true: other orchid varieties can spread viruses to vanilla and wipe it out, so make sure to keep vanilla away from other orchid plants.
Related: 12 Herbs And Spices To Grow In The Tropics
How to Pollinate Vanilla

The bees that naturally pollinate vanilla are found only in Mexico, so those of us in Hawai’i or other tropical locations without native pollinators will have to hand-pollinate in order to get vanilla pods.
Without manually pollinating the vanilla, you will simply have pretty flowers but no pods.
Tools you need: a toothpick or small twig.
You’re going to do the work of the bee here, by gently taking some of the pollen and brushing it against the ‘stigma’ of the plant. This is what a bee would do with its feet as it moves about from flower to flower, so it doesn’t have to be an exact amount, just a little bit. \
The stigma has a protective cover around it, so you have to gently pull this pack in order to brush the pollen-tipped toothpick against it. Make sure to properly close back the cover after you’re done.
The tricky part? Vanilla is a climbing vine, so some of the blossoms you want to pollinate may be pretty high up the trellis or tree. You could use a ladder or step stool – some vanilla growers even use stilts! But remember, it’s a delicate maneuver to pollinate the vanilla flower, and you want to have very good footing.
If pollination was a success, you’ll start seeing the formation of pods after about 7 days. Then, you’ll need to wait another 9 months for the pods to finish maturing.
How Long Does Vanilla Take To Fruit
If you really want to get vanilla beans, then you have got to be both patient and fast.
Even with a cutting, it will take a good nine months to a year for your vanilla vine to produce harvestable bean pods (and then, you’ll have to cure them, too).
But, you have to be quick when the vanilla blossoms flower, because you have a short window of time to complete the pollination process, or else you’ve missed your opportunity and will have to wait another 9 months to try again.
How Much Does The Average Vine Produce
A normal, healthy vanilla plant may produce something like 50 or 120 orchid flowers each growing season.
It’s best practice to hand pollinate only a fraction of these, not every single one of them. This way, the plant gives nutrients to only a few pods and results in tastier, higher-quality vanilla beans in the end.
If you attempted to hand pollinate every single bloom, you’d end up with lots of small vanilla bean pods, and after the curating process they would shrivel up to almost nothing. Aim to hand pollinate only 20-25 blooms on one plant and get good-sized and richer vanilla.
Considering the cost of a single vanilla pod (over $10 each), it’s well-worth the effort!
Related: 12 Best (Uncommon) Fruit Trees To Grow In The Tropics
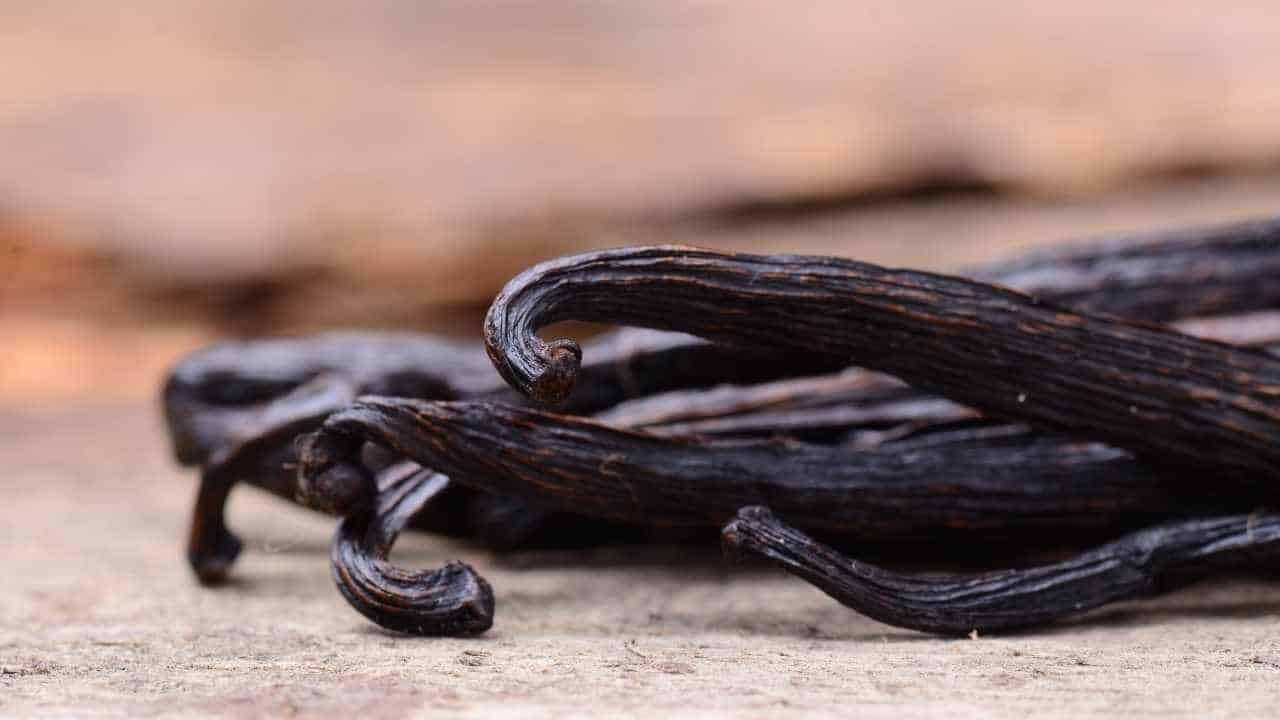
How To Process The Vanilla Bean
Green vanilla beans aren’t the aim here: cured beans are. Curing (or a process of sweating and drying) preserves the bean and brings out that delicious flavor.
Everything with vanilla seems to take a while, and curing is no exception. This process takes several months.
- Freeze ripe pods – As your bean pods ripen, pick them and start a little freezer collection. Because your pods will ripen at different times, this is the best way to make sure you have your full vanilla harvest when you start curing.
Allow your vanilla to thaw (you can just drop the sealed freezer bag in a large basin of hot water for 30 minutes) before starting the next step. - Sweat your beans – Beans should sweat to release moisture but not become overly dry.
There are a few methods to achieve this:
- Lay beans outside in the hot sun during the day, and wrap them in plastic and a blanket (yes – a blanket) at night. Repeat daily for at least 6 weeks.
- Use an insulated cooler made hot with jugs of hot (not boiling) water. Drop the beans (still sealed in a plastic bag) inside the (hot) cooler for 2 days, then transfer to a food dehydrator. Alternate 1 day of sweating and 1 hour in the food dehydrator for approximately 3 weeks, or until the beans are completely brown and wrinkly.
- Use a sweat box. A great DIY option for building a sweatbox is provided by Kaua’i’s The Vanillery.
- Dry out the beans – The traditional method for drying vanilla beans is slow-drying under the sun. This can take months, but requires little effort after ensuring the beans cannot get rained on or distrubed.
The key here is slow drying. There is no benefit to rushing the drying process, as it’s important for developing that delicious vanilla flavor.
Some options for drying include:
- Solar food dehydrator that is not put in direct sunlight, so that it works extra-slowly.
- Regular food dehydrator with the heat turned OFF and only using the appliance’s fan.
- A heat lamp located a good distance away from the beans, so as to encourage slow drying. Turn the lamp off at night, to replicate the sun setting.
- Sun-dried on a roof, well-protected from rain or anything that would disturb the beans.
- Condition the beans for 3 months – Place beans in a sealed plastic bag and forget about them for 3 months in a dark, dry place. Make sure the bag is completely sealed and that no moisture can get in.
Finally, after all this time – you’re done! You have your own, cured vanilla beans.
Growing vanilla requires a lot of time and effort and patience to grow. We are lucky that Hawai’i is one of the only places in the U.S. where vanilla can grow, even though it does have to be hand-pollinated. If you’re interested in expanding your homestead to include vanilla, then this is the place to do it.
Homesteadinhawaii.com is a participant in the Amazon Services LLC Associates Program, an affiliate advertising program designed to provide a means for sites to earn advertising fees by advertising and linking to Amazon.com. This site also participates in other affiliate programs and is compensated for referring traffic and business to these companies.